Installation Instructions:
Estimated time of completion is 1 hour. Instructions are identical for both sides of the vehicle.
Package Contents:
First ensure that you have all of the required components before proceeding with installation. If anything is missing please contact us immediately for assistance.
- Two (2) camber shims (marked D and P)
- Two (2) backing plates
- Eight (8) hex bolts
- Eight (8) washers
- Eight (8) split lock washers
Tools Needed:
- Floor Jack
- Jack Stands
- Lug Wrench
- Small Flathead Screwdriver
- Rachet with the following socket sizes: 10mm, 12mm, 14mm
- 8mm Hex Driver Socket
- Torque Wrench
Step 1: Vehicle Prep/Wheel Removal
After applying the parking brake, jack up the rear of the vehicle and secure it on jack stands, then remove the rear wheels.
Step 2: Hub Assembly Removal
2A: Using the small flathead screwdriver, carefully push down on the tab of the ABS plug (figure 1) and remove it from the hub.
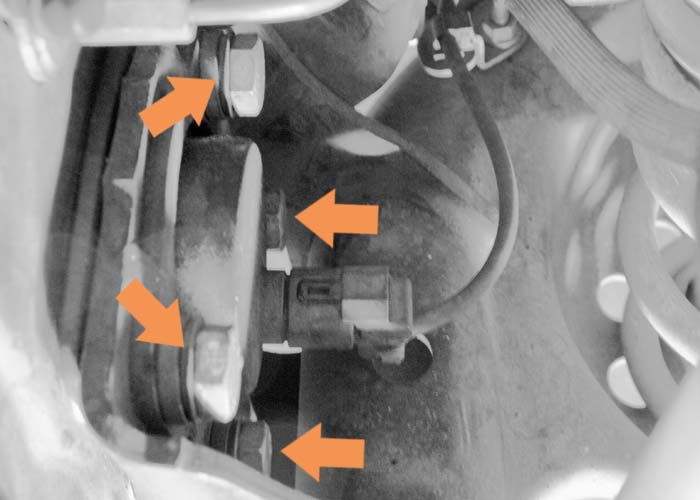
2B: Using the 10mm socket, remove the nut holding the parking brake cable bracket (figure 2A).
2C: Using the 14mm socket, remove the bolt holding the brake hard line (figure 2B).
2D: Using the 12mm socket, remove the four (4) bolts that attach the hub assembly to the suspension arm (figure 3).
2E: Carefully pull the hub assembly away from the suspension arm. Take care not to bend or kink the brake line.
Note: You'll only need to pull the hub out a few inches to install your camber shim.
Figure 1: ABS sensor removal
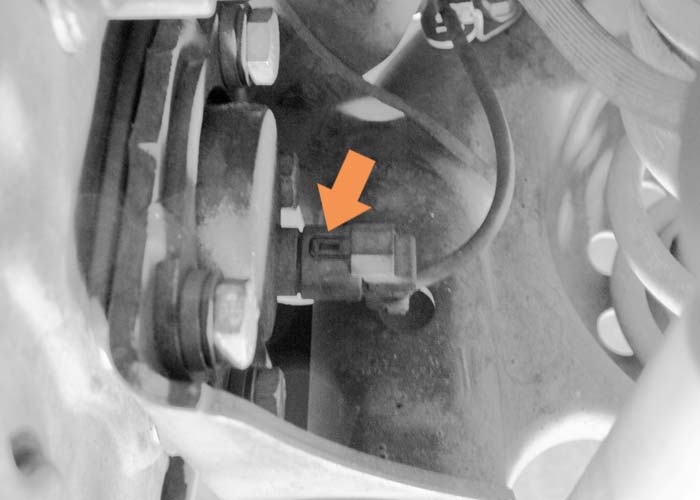
Figure 2: Parking brake nut and brake hard line bolt removal

Figure 3: Hub assembly bolt removal
Step 3: Camber Shim Installation
3A: Prepare the new bolts beforehand by placing one split lock washer, then one standard washer on each bolt.
3B: Grab the shim that corresponds with which side of the vehicle you're working on (D for drivers side, P for passenger side).
3C: Place the camber shim in-between the hub assembly and the suspension arm (figure 4). Make sure that the corresponding D or P is facing up and out towards the fender and place the hub assembly back on to the suspension arm.
3D: With the hub assembly in place, set a backing plate (these are not side-specific) behind the control arm bracket and align the four holes. The backing plate has countersunk holes for the washers, make sure these are facing away from the hub and towards the opposite fender (figure 5).
3E: Install and hand-tighten the four bolts, take care when threading them in. Once they're all in torque the bolts in a criss-cross pattern to 46 ft-lbs..
Figure 4: Camber shim placement
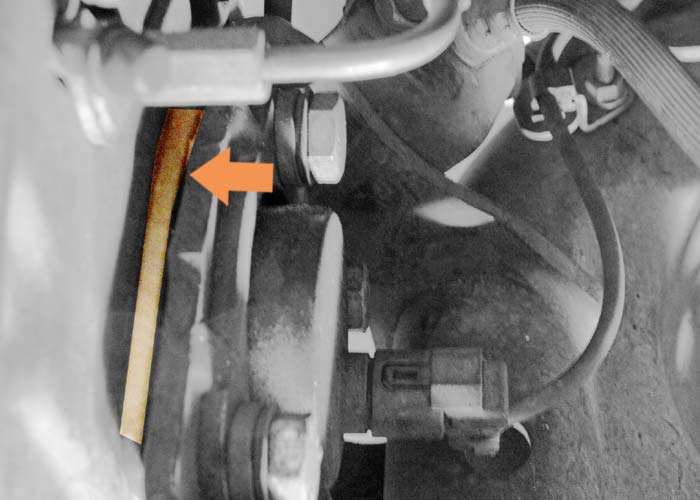
Figure 5: Backing plate installation
Step 4: Final Assembly
4A: With the hub assembly reinstalled we can now reattach the previously removed fasteners.
4B: Using the 14mm socket, realign and reinstall the bolt that holds the brake hard line.
4C: Using the 10mm socket, realign and reinstall the nut that holds the parking brake cable.
4D: Plug the ABS sensor back in.
All Done!
Note: These camber shims are recommended for off-road use only and RealCamber.com, Made Industries and our affiliates are in no way responsible for any misuse or damage incurred from use, improper or otherwise.